FuelDirect
________________________________________________________________________________
Here you have a small step by step guide on how to access and change some dispenser-specific configurations in FuelDirect. This includes model type, decimal settings, and some pump-specific configurations. For this guide, Fuel Direct will be set up to communicate with Wayne dispensers, since Wayne is one of the few pump brands with lots of settings and configuration options.
Note: the settings you will see in this guide are only for Wayne dispensers. Kraus dispensers are similar. Other brands contain different options and settings. If you require assistance understanding some of the options in the settings section, please reach out to us first before making any changes.
________________________________________________________________________________
Make FuelDirect Visible
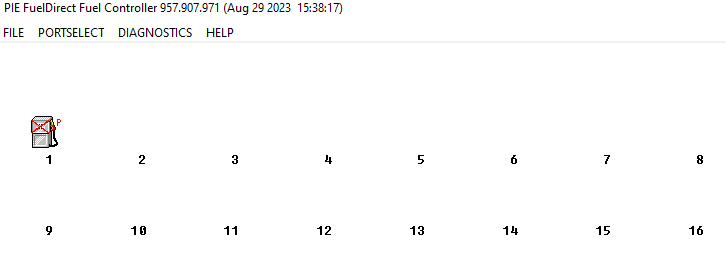
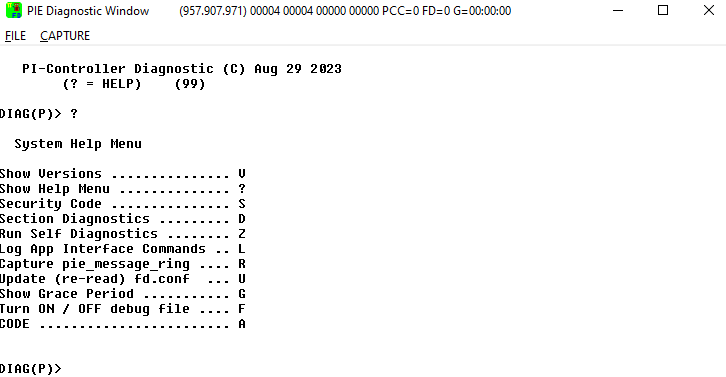
Click on Diagnostics. This will open the Diagnostics window. On your keyboard press the question mark (?) to bring up the Diagnostics menu.
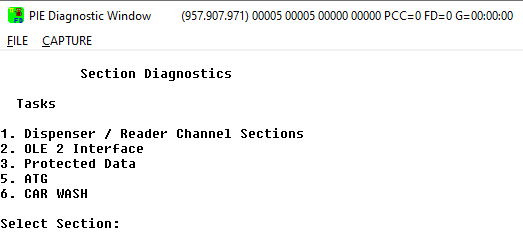
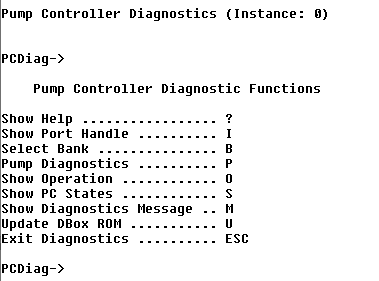
On your keyboard, press D to access the Section Diagnostics menu.
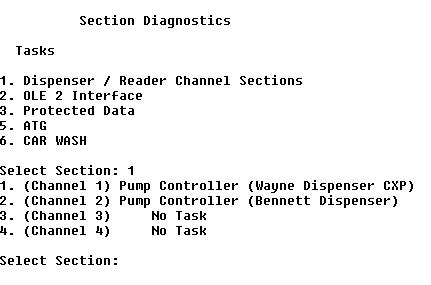
On your Keyboard, press 1 to access the Dispenser/Reader Channel Sections.
On this section, you will press on your keyboard the number of the channel corresponding to the dispenser you want access to. After doing this, you will need to press ? on your keyboard again to bring up the menu for that section.
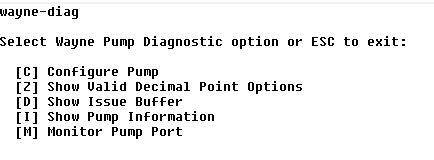
Press P on your keyboard to enter the Pump Diagnostics menu.
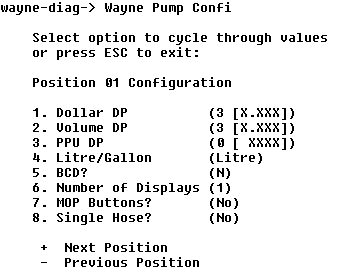
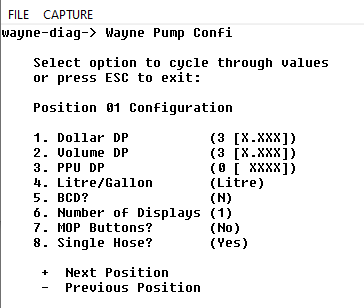
Now press a C on your keyboard to enter the Configure Pump menu.
Here we have multiple options. Most of the settings here are not global, meaning that you will need to cycle between fueling positions by pressing + on your keyboard to advance to the desired fueling position or by pressing - on your keyboard to go to the previous fueling position. You will need to press on your keyboard the corresponding number for the configuration you want to change.
After making changes, move to another fueling position if you need to make changes to other pumps. After making all the changes, press the ESC key on your keyboard to go back to the previous menu. This will save your selections. From this point on, you can close the window and resend prices if necessary.
________________________________________________________________________________
Additional important information regarding the Configure Pump menu:
When turning on the Single Hose option, the Diesel hose will always be Hose #1. Meaning that the price for Diesel must be sent to Hose #1.
The selections you see in that menu, as well as how the menu looks, will vary by the brand of the dispenser.
Some brands of dispensers, like PMC for example, don't require further configuration in that menu in most cases.
Some configurations in that menu have more than two options available per category, specially for those brands that require a set model type for each dispenser. Just keep pressing the number for that category and you will toggle between the options.
If you make a menu selection, but you don't see any options, press the ? on your keyboard to bring up the menu for that corresponding section (if available).
If you need to go back to the previous menu, press ESC on your keyboard.
If only one channel is setup in Fuel Direct, you can quickly access the Configure Pump Menu by typing on your keyboard the following sequence once you get to the Diagnostic Window:
D → 1 → 1 → P → C
Was this article helpful?
That’s Great!
Thank you for your feedback
Sorry! We couldn't be helpful
Thank you for your feedback
Feedback sent
We appreciate your effort and will try to fix the article